 Wallogit.com
2017 © Pedro Peláez
project astro-quiz
pbrus/astro-quiz
- Monday, November 20, 2017
- by PBrus
- Repository
- 1 Watchers
- 0 Stars
- 45 Installations
- CSS
- 0 Dependents
- 0 Suggesters
- 1 Forks
- 0 Open issues
- 1 Versions
- 2 % Grown
The README.md
Astro-quiz
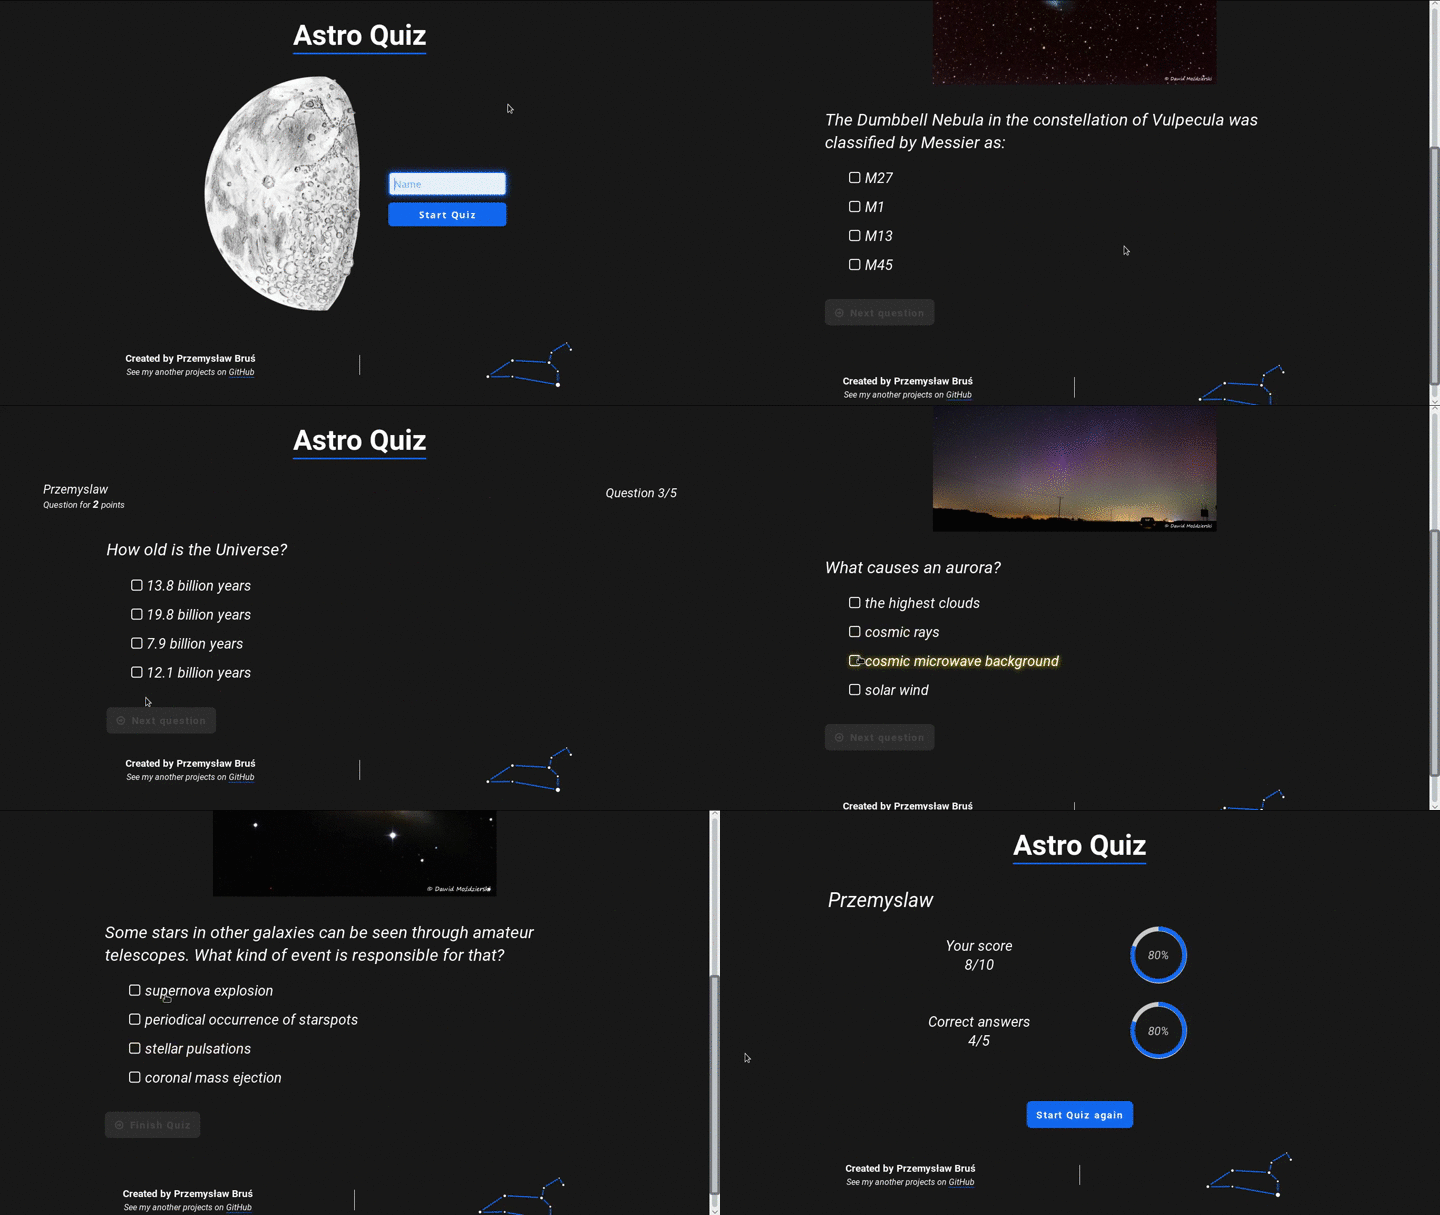
A little advanced quiz for astronomy enthusiasts. Designed for students and small groups of amateur astronomers., (*2)
 , (*3)
Introduction
The program was designed to run locally, not on the Internet. The application uses a web browser only as an interface. For example, astro-quiz doesn't cooperate with any database but stores all information in text files and utilizes a session mechanism. However, it can be used by many users simultaneously, e.g. for students in a classroom (computers connected through LAN)., (*4)
Installation
General information
I assume that you're not familiar with PHP applications and how to install them. Let's split the whole installation process into significant parts:
1. Download and install XAMPP with PHP 7.0 or greater
2. Install Composer for Linux or Windows
3. Change the localhost path just editing two lines in httpd.conf file
4. Start/restart XAMPP
5. Open yor favourite web browser and type localhost into the address bar, (*5)
Note that this is the easiest way to install the application because the program does't worry about security on the Internet., (*6)
Linux
Execute first two instructions from the General information section manually. If you successfully install XAMPP with default settings, php should be located in the /opt/lampp/bin/ directory. After installation I recommend to move the composer.phar file to any catalog pointed by the $PATH variable and to change its name to composer., (*7)
In the next step choose the destination directory where you want to install application, open a terminal window and go there. Download the repo and all required components typing:, (*8)
$ composer require pbrus/astro-quiz=dev-master
Instructions included in 3. and 4. lines will be executed automatically by the install script. To do this log in as root:, (*9)
$ su
and run the script:, (*10)
$ bash vendor/pbrus/astro-quiz/install
Note that the use of sudo instead of su sometimes can't call composer. If everything goes well, you will see the message The installation has been completed. It's time to open your web browser and test the application typing localhost into the address bar., (*11)
To start XAMPP after computer rebooting type into the terminal window:, (*12)
$ sudo /opt/lampp/lampp start
Windows
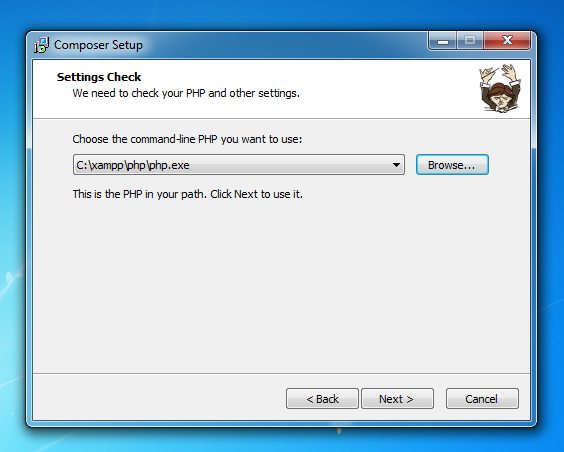
Execute first two instructions from the General information section manually. If you successfully install XAMPP with default settings, php.exe should be located in the C:\xampp\php\ directory. Note that you have to point at the php.exe file during Composer installation., (*13)
 , (*14)
In the next step create an empty directory to store the whole project. Let's assume that it will be the astro-quiz located in D:\, i.e. D:\astro-quiz\. Open the cmd.exe and go there typing:, (*15)
> D:
and further:, (*16)
> cd astro-quiz
Now it's time to download the project using Composer. Please type into cmd.exe:, (*17)
> composer require pbrus/astro-quiz=dev-master
Then copy all files and directories from D:\astro-quiz\vendor\pbrus\astro-quiz\ to D:\astro-quiz\ (just change the structure of the project). After all, type into cmd.exe:, (*18)
> composer dump-autoload
Note that your current localization must be D:\astro-quiz\., (*19)
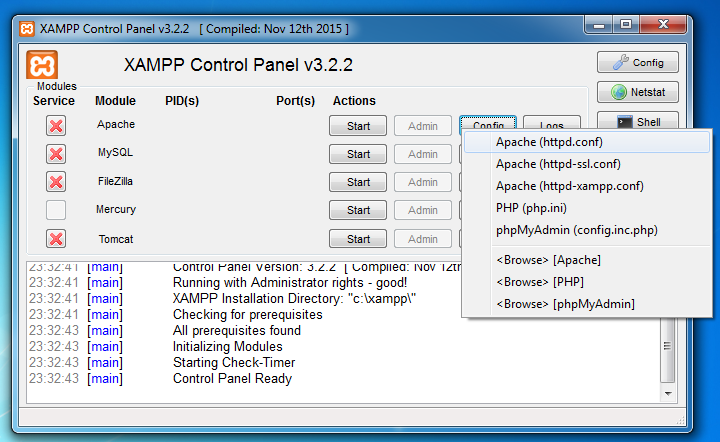
At the end you must connect localhost with the project's directory. To do this open the XAMPP Control Panel and edit two lines in the httpd.conf file:, (*20)
DocumentRoot "C:/xampp/htdocs"
<Directory "C:/xampp/htdocs">
DocumentRoot "D:/astro-quiz"
<Directory "D:/astro-quiz">
 , (*21)
Save changes and start/restart Apache. Open your web browser and test the application typing localhost into the address bar., (*22)
To start XAMPP after computer rebooting open the XAMPP Control Panel and start the Apache module., (*23)
Usage
The package contains demo files so you can easily test astro-quiz after the installation process. Of course you can prepare your own questions. Let's see the most important parts of the project., (*24)
Web browser
A web browser is a BUI for users and an administrator which oversees the users. To start quiz type into the address bar localhost. To see results, statistics and to manage the database please type into address bar localhost/admin.php. Access to this page is secured by the password stored in the astroquiz.cfg file., (*25)
Define own quiz
All files needed to define own quiz must be located in the files/ directory. You should create a text file to store all questions, points, answers and names of images if are required. You can create as many text files as you need. The current quiz is called in the astroquiz.cfg file., (*26)
I encourage to visit my website to see more detailed description of this project. The current link can be found on my GitHub profile., (*27)
Credits
-
Pure CSS Circular Percentage Bar, (*28)
Used on the last page with results., (*29)
-
Fontello - icon fonts generator, (*30)
Used icons:, (*31)
- icon-check
- icon-check-empty
- icon-right-circled2
-
Demo images from My subjective astronomy, (*32)
Used files:, (*33)
- question1.jpg
- question2.jpg
- question4.jpg
- question5.jpg
License
Astro-quiz is licensed under the MIT license. Some external components have own licenses. See the license file for more details., (*34)


